




How to Cure THCA Flower: The Complete Guide to Drying and Curing

Post-harvest is where potency and quality are won or lost. You can grow a flawless THCA cultivar — dialed-in nutrients, perfect light schedule, clean genetics — and still end up with a harsh, low-shelf-appeal product if the drying and curing process is rushed. Conversely, an average harvest handled with a disciplined slow-dry and cure can outperform "premium" flower that got thrown in a bag too early.
If you've ever wondered how to cure THCA flower the right way, this guide breaks down the entire post-harvest process: the science of what's happening inside the bud, the exact temperature and humidity targets for drying hemp flower, a full burping and curing timeline, and the storage habits that protect potency and terpene profile for months. Whether you're a home grower dialing in your process or a shopper trying to understand what separates fresh flower from stale, this is the complete playbook.
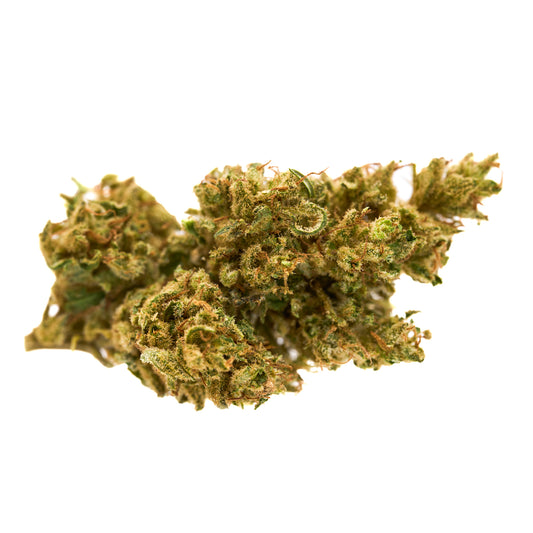
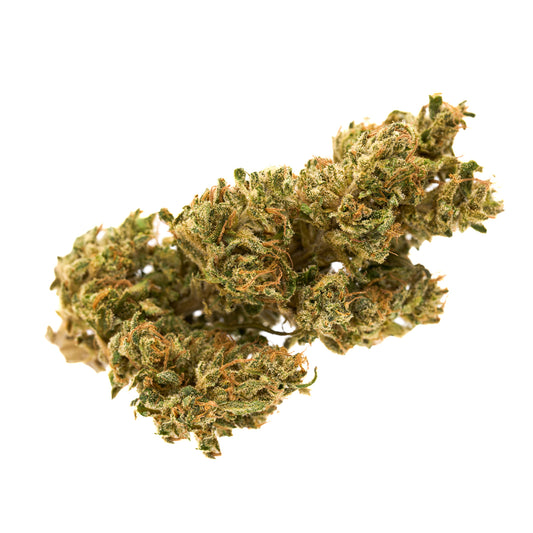
And if you're looking to buy rather than grow, cure quality is exactly what separates flower that smells and smokes great from flower that just sits in a jar — browse our newest THCA flower releases to see what a properly cured batch looks and smells like.
What Actually Happens During Drying and Curing
Before getting into technique, it helps to understand why this stage matters so much for potency, flavor, and smoothness.
Drying is the removal of surface and internal moisture from the flower after harvest. Fresh-cut THCA flower can be 75–80% water by weight. The goal of drying isn't just to make the bud "not wet" — it's to slow the moisture loss down enough that chlorophyll breaks down, cell walls degrade properly, and the plant doesn't lock in a "hay" or "grassy" smell.
Curing is a separate, slower process that happens after the flower has dried to a workable moisture level (typically 10–15%). During curing, the flower is sealed in an airtight container and allowed to continue an anaerobic (low-oxygen) breakdown process. This is when:
- Residual chlorophyll continues to degrade, reducing harshness
- Starches and sugars in the plant tissue break down, smoothing out the smoke
- Moisture equalizes throughout the bud — the outside and inside reach the same hydration level
- Terpenes stabilize and mature rather than evaporating off during a fast dry
- Microbial activity, if managed correctly, contributes to flavor development without triggering mold
This is also where THCA content is best preserved. THCA (tetrahydrocannabinolic acid) is heat- and light-sensitive — it slowly decarboxylates into THC even at room temperature, and that conversion rate accelerates with poor storage. A controlled dry and cure doesn't stop this process entirely, but it dramatically slows it compared to flower that was rushed, over-dried, or stored improperly. This is the foundation of THCA shelf life — everything downstream, including storage, builds on how well this stage was executed.
The Slow-Dry Method: Temperature and Humidity Targets
Rushing the dry is the single most common mistake in post-harvest handling, and it's the reason so much flower ends up harsh, brittle, or lacking aroma. The slow-dry method for drying hemp flower prioritizes a controlled, gradual moisture loss over several days rather than force-drying in 24–48 hours.

Why these ranges matter:
- Temperatures above 70°F accelerate moisture loss too quickly, which locks in chlorophyll and can trap terpenes before they've had a chance to mature — resulting in a grassy, harsh smoke.
- Humidity below 55% dries the outer layer of the bud too fast while the interior is still wet, a condition sometimes called "case hardening." This traps moisture inside, creating a mold risk later even though the flower looks dry on the outside.
- Humidity above 62% slows drying too much and significantly raises the risk of bud rot (botrytis) or powdery mildew, especially in dense colas.
- Direct airflow dries the outer surface unevenly and can degrade trichomes, which is where the majority of cannabinoid and terpene content lives.
- Light exposure during drying — even ambient light — degrades THCA and terpenes through UV breakdown. Drying rooms should be as close to blackout conditions as possible.
How to Know When Drying Is Complete
The classic test: gently bend a small stem. If it bends without breaking, moisture content is still too high. If it snaps cleanly, the flower has reached roughly 10–15% moisture content — the correct window to move into jars for curing. Going by "days elapsed" alone is unreliable, since humidity, room airflow, and bud density all affect drying speed differently from batch to batch.
For growers handling any real volume, an investment in a hygrometer for the drying space (not just the individual jars) pays for itself quickly — guessing on drying hemp flower conditions is where most quality loss happens before curing even begins.
Burping Jars: The Complete Curing Timeline
Once flower has properly dried, curing begins. This is where flower goes from "acceptable" to genuinely premium — and it's the step most commonly skipped or rushed by growers trying to move product to market faster.
Step 1: Jar the Flower Correctly
Use wide-mouth glass jars (mason jars are standard) filled to roughly 75% capacity — never packed tight. Buds need airspace to allow the burping process to work. Break larger colas into smaller, manageable pieces but avoid over-trimming or breaking down buds too small, which increases surface area exposure and speeds terpene loss. Aim for the best humidity to cure THCA buds — 58–65% relative humidity inside the jar — from the very first seal.
Step 2: The First Week — Daily Burping
For the first 5–7 days, follow proper technique for how to burp curing jars THCA: open each jar once or twice daily for 10–15 minutes. This releases built-up moisture and gases (including ammonia-like odors from early chlorophyll breakdown) and reintroduces fresh oxygen.
What to watch for during burping:
- Musty or ammonia smell → flower still has excess moisture; leave lids off slightly longer or briefly re-open drying process
- Crispy, dry texture → jar was sealed too early or humidity dropped too low; consider adding a humidity pack
- Sticky, wet-feeling buds → too much moisture retained; extend open-air time before resealing
Step 3: Weeks 2–4 — Reduced Burping Frequency
Once the smell inside the jar shifts from grassy/ammonia to a cleaner, sweeter, more aromatic profile (usually days 5–10), reduce burping to once every 2–3 days. This is the stretch where terpene development really happens — the flower is stabilizing internally, and you're managing humidity rather than actively drying it further.
Step 4: Weeks 4–8 — The Extended Cure
Most curing hemp for potency work happens in this window. A 4-week cure is considered the minimum for noticeable improvement in smoothness and flavor. An 8-week cure is where flower develops its full aromatic complexity — many experienced growers consider this the sweet spot for flower intended for premium retail.
Step 5: Beyond 8 Weeks — Long-Term Curing
Flower can continue curing for 3–6 months with proper humidity control (62–65% RH using two-way humidity packs), with some cultivators reporting continued smoothness improvements even at the 6-month mark. Beyond that point, gains diminish and the priority shifts fully to storage and preservation rather than active curing.
Suggested Curing Timeline At a Glance
| Timeframe | Burping Frequency | What's Happening |
|---|---|---|
| Days 1–7 | 1–2x daily | Moisture release, ammonia smell fading |
| Days 8–28 | Every 2–3 days | Terpene stabilization, chlorophyll breakdown |
| Weeks 4–8 | Weekly or as needed | Flavor complexity develops, smoke smooths out |
| Months 3–6 | Passive (humidity pack monitoring) | Long-term preservation, minor continued refinement |
How Curing Affects Terpene Retention and Smoke Smoothness
Terpenes are the aromatic compounds responsible for flower's smell and much of its flavor, and they are notoriously volatile — meaning they evaporate easily under heat, light, and improper airflow. This is the biggest reason a rushed dry-and-cure process produces flower that smells and tastes flat compared to a properly cured batch, even if the underlying cannabinoid content is identical.
Why curing protects terpenes:
- Lower, stable temperatures during both drying and curing reduce terpene volatilization compared to fast, high-heat drying methods.
- Sealed jar environments during curing limit oxygen exposure, which slows terpene oxidation — a major cause of flavor degradation over time.
- Gradual chlorophyll breakdown during the cure removes the "green," plant-matter taste that otherwise masks the terpene profile underneath.
- Humidity control prevents the flower from drying out to the point where terpene-rich trichomes become brittle and shed.
Why curing improves smoothness:
Harsh smoke is largely a byproduct of residual chlorophyll, sugars, and starches still present in under-cured flower. Combustion of these compounds is what produces that sharp, throat-catching harshness. As curing hemp for potency progresses, microbial and enzymatic activity breaks these compounds down, which is why properly cured flower burns with a noticeably smoother draw and a cleaner ash color (light gray, not black or green-tinged).
This is also the reason cure quality is such a strong differentiator when shopping — high lab-reported potency numbers tell you nothing about how the flower will actually smoke or taste once it's in your hands.

Common Curing Mistakes That Kill Potency and Quality
Even experienced growers make these errors, and they're worth checking against your own process:
- Jarring flower too wet. Moving flower into airtight jars before it hits the 10–15% moisture window traps excess humidity and creates a serious mold risk, even with regular burping.
- Jarring flower too dry. Over-dried flower loses the moisture needed to complete the curing process at all — it just sits static, brittle, and harsh, with no smoothing effect.
- Skipping burping in the first week. This is when the most active off-gassing happens. Skipping it risks trapped moisture and mold, especially in dense, humid climates.
- Curing in direct light or warm rooms. UV and heat degrade both THCA and terpenes throughout the entire cure — not just during drying.
- Overpacking jars. Flower needs airspace for gas exchange during burping; tightly packed jars trap moisture unevenly.
- Cutting the cure short to meet demand. This is the most common commercial mistake — rushing a 1–2 week "cure" to move inventory faster, which shows up immediately in smoke quality and customer feedback.
Storage Best Practices for Long-Term Shelf Life
Once flower has completed curing, storage habits determine how long that potency, aroma, and smoothness actually last — whether that's a home stash jar or a retail shelf. Knowing how to store THCA flower to keep it fresh is just as important as the cure itself.
Core Storage Principles
- Airtight glass containers — UV-protected or opaque glass is ideal; plastic can impart odor and doesn't block light as effectively.
- Humidity range: 58–62% RH — maintained with two-way humidity control packs inside storage containers.
- Temperature: 60–70°F, stable — avoid temperature swings, which cause condensation cycles inside sealed containers.
- Darkness — store away from direct light and even prolonged ambient light exposure.
- Minimal oxygen exposure — limit how often containers are opened; oxygen exposure is a leading driver of cannabinoid degradation over time.
THCA-Specific Storage Considerations
THCA is more heat- and light-sensitive than finished THC, since it will continue decarboxylating into THC over time even without combustion — this is a natural process, but poor storage accelerates it significantly. Flower stored in the conditions above can maintain strong potency and aromatic quality for 6–12 months, while flower left in poor conditions (heat, light, loose bags) can noticeably degrade within just a few weeks.
For THCA shelf life, the three biggest threats, in order of impact, are: heat, light, and oxygen exposure — in that order. Humidity control matters too, but primarily for preventing mold rather than preserving cannabinoid content.
This is why freshness at the point of sale matters just as much as freshness at harvest. Every batch we list is handled with this full process in mind — see current freshness-guaranteed inventory in our new THCA flower releases.
How This Applies Beyond Flower: THCA Concentrates and Extended Products
The same principles that protect flower quality carry over into anything made from it. Concentrates — wax, shatter, live resin, and similar extracts — are only as good as the starting material. Flower that was rushed through drying or skipped its cure typically yields extracts with a flatter terpene profile and harsher dab, because much of what's lost during a bad cure (terpenes, smoothness-enhancing chemical breakdown) can't be recovered in extraction.
For consumers evaluating pre-rolls, trim, or kief sourced from a given batch, the same freshness logic applies: ask when the flower was harvested, how long it was cured, and how it's been stored since. A batch that's a few weeks old but properly cured and stored will consistently outperform a "fresher" batch that was rushed to market. Comprehensive quality control — from cultivation through cure through storage — is what separates flower worth buying from flower that's simply available.
Frequently Asked Questions
How long to cure THCA flower before smoking it?
A minimum of 2 weeks produces a noticeable improvement over uncured flower, but 4–8 weeks is the generally recommended range for meaningfully smoother smoke and fuller terpene expression. Some cultivators continue curing for 3–6 months for premium results.
Does curing increase THCA potency?
Curing doesn't increase total cannabinoid content — that's set by harvest timing and genetics. What curing does is preserve potency by slowing the natural degradation and decarboxylation process, and it improves the overall smoking experience by reducing harshness and enhancing terpene flavor, which is often perceived as "stronger" even when lab-tested potency is similar.
What's the best humidity to cure THCA buds?
During active curing, aim for 58–65% relative humidity inside the jar. Below 55% risks over-drying and terpene loss; above 65% raises mold risk, particularly in dense colas.
How do I burp curing jars THCA correctly?
Once or twice daily for the first week, tapering to every 2–3 days through week four, and then weekly or as-needed after that as humidity stabilizes.
Can you over-cure THCA flower?
Yes, though it takes a long time. Most quality gains happen within the first 8 weeks. After 3–6 months, improvements level off, and the priority shifts to storage conditions rather than active curing.
What's the best way to store THCA flower to keep it fresh long-term?
Airtight, UV-protected glass containers, held at 58–62% relative humidity with two-way humidity packs, in a cool (60–70°F), dark space with minimal opening frequency.
Why does my cured flower still smell grassy?
This usually indicates the flower was jarred too early (excess chlorophyll still present) or the cure was cut short. Extending the cure by another 2–3 weeks with consistent burping typically resolves it.
